Creating a Geofence
A geofence is a virtual fence that can alert you to a device (Asset, Person or Vehicle) entering or exiting an area or deviating from a defined path. The alert may be simply a different icon for the vehicle on the map view, a pop-up alert on your screen or an alert may be sent to users via e-mail. You can create three types of geofences: circle, polygon, or route. A circle or polygon type geofence is used for an area. For example, perhaps you may want to know when a vehicle leaves or arrives at your company lot after hours or on weekends. A route geofence is used to keep a vehicle on a designated path. As an example, this could be used to define a detailed route for a hazardous waste vehicle -if the vehicle deviates from the specific roadways that you designate, you would receive an alert. There are two steps to creating a geofence: drawing and assigning it to a vehicle. Alerts are set up once for all geofences.
Once geofences are created, they may be viewed on the Tracking page by selecting the Show Geofences icon on the lower area of the vehicle list.
For our example, we will create and assign a polygon type geofence, and then set up the alerts for geofences.
Step 1: Create the geofence.
To access the geofence features, click on the Geofence tab in the main tab groups along the top of the page. Once there, click on the Create Geofence tab below the Geofence Configuration header.
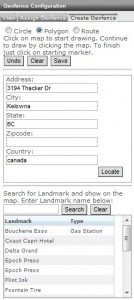
Select the radio button beside Polygon. Before drawing the geofence, you need to position the map to the location to place the geofence. This may be done in three ways:
a) Map Navigation: use the map navigation controls to zoom to the location for the geofence.
b) Locate an address: Enter the street address, city, state and country and click on Locate.
c) Landmark: click on Search to load the list of landmarks or type in the name of a particular landmark, then click Search. Click on the landmark name to center it on the map.
Positioning the map by address or a landmark will place an icon on the map for the location. The map may then be zoomed or panned for your preferred view. Be careful when panning to hold the mouse button down; if you just click on the map, the first location for the geofence will be set. If this happens, click the clear button and repeat placing the location on the map.
The starting point for any of the geofence types is indicated by the start ![]() icon.
icon.
Continue to draw the polygon by clicking on the map at the next points for the polygon. If you have misplaced any points, click the Undo button to remove the last placed point. You may continually click the Undo to remove any previous points.
Once you are at the last point for the polygon, click the starting point icon to close and finish the geofence.
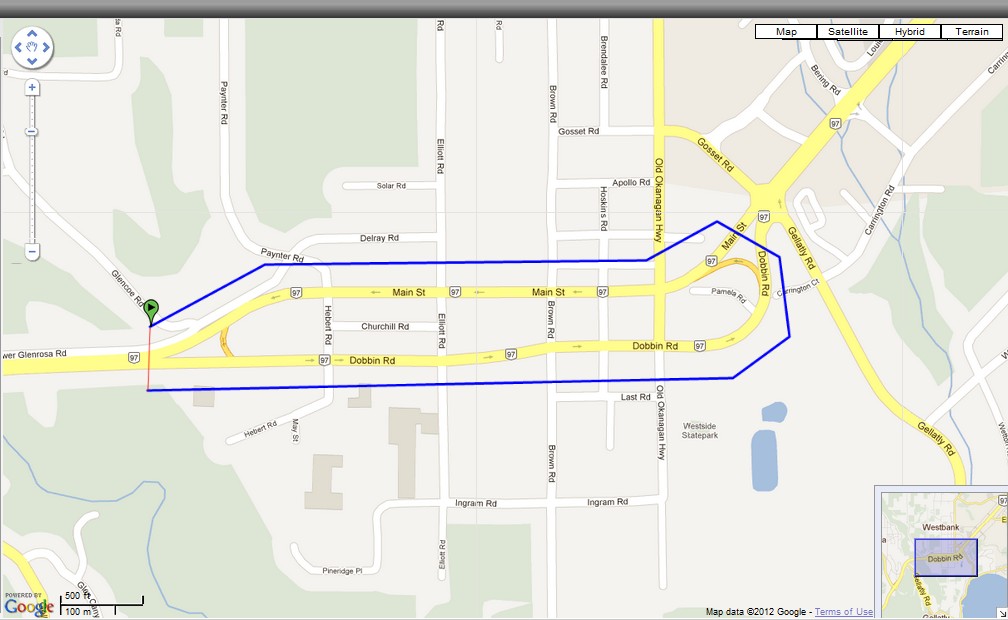
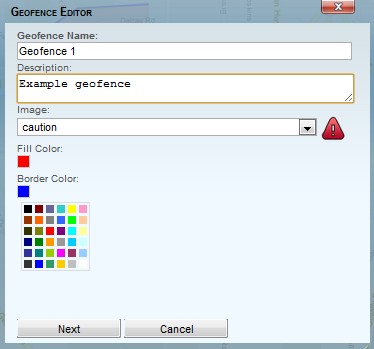
After completing the geofence, click on the Save button to open the Geofence Editor window.
In the first panel, type in a Name for the geofence, and optionally you may add a Description, select an Image or change the Fill or Border Color.
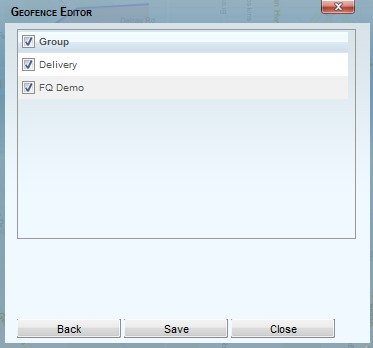
Click on Next, select the Group(s) and click Save.
Step 2: Assign the geofence.
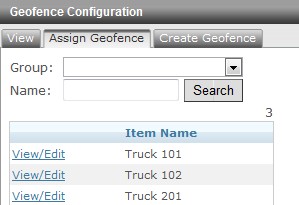
Click on the Assign Geofence tab below the Geofence Configuration header.
You may view the vehicle list by group or by individual vehicle by selecting the Group from the drop down list or type a vehicle name in the Name field and click on Search.
To list all vehicles, leave the Group and Name fields blank before you click on Search.
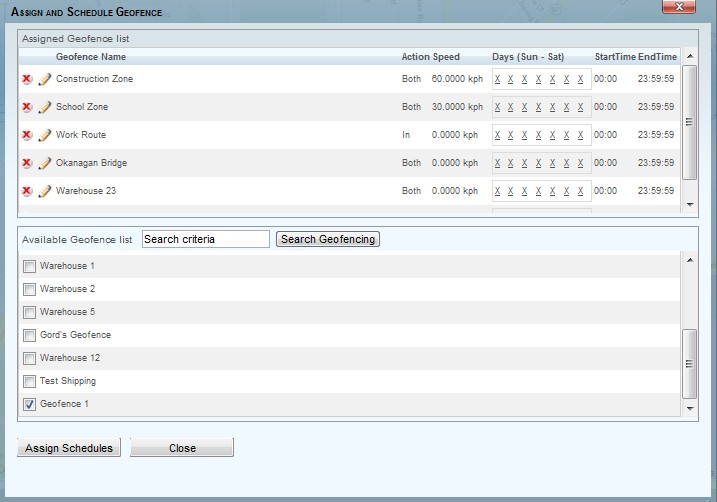
Click View/Edit next to the vehicle that you want to assign the geofence to. The Assign and Schedule Geofence window will open.
The top half of the window shows assigned geofences, if any, and the lower half shows available geofences for assigning.
Click in the checkbox beside the geofence name to select it. Multiple selections may be made by clicking on as many names as necessary. All selections will have the same schedule. Click on Assign Schedules to proceed.
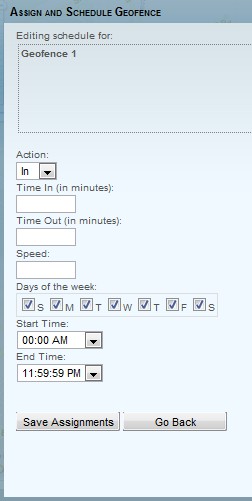
Choose the type of Action from the dropdown list. The choices are:
In = generate a violation if the vehicle enters the geofence. If a geofence alert is setup then an alert will be created when the item enters the geofence.
Out = generate a violation when the vehicle exits the geofence. If a geofence alert is setup then an alert will be created when the item leaves the geofence.
Both = generate an alert when an item enters or exits the geofence. This is the recommended choice.
Optional: enter a Time In and Time Out (minutes) to control how long a vehicle needs to be in or out of the geofence before activating.
Optional:
Enter a speed if you want to control the speed of a vehicle inside the geofence.
Select the days of the week and start and end times for the geofence to be in effect.
Click on the Save Assignments button.
Step 3: Set up Geofence Alerts.
From the Dashboard tab, select the Group to add the alert to (typically the Default Group).
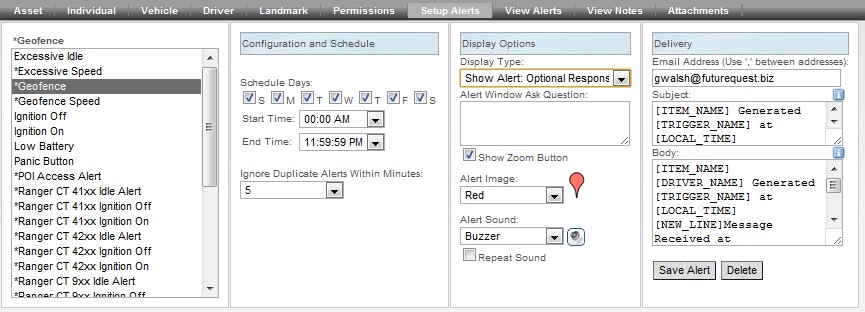
In the Group Editor, select the Setup Alerts tab and click on Geofence in the Alert list.
The Alerts are configured in 3 sections:
1. Configuration and Schedule
Select the Days and Starting and End times for the alert to be in effect.
To avoid excessive alerts, you may enter a time in minutes to ignore duplicate alerts.
2. Display Options
If you only want an email alert, select Do Nothing. To show a popup on the Tracking screen, select Show Alert with either Optional or Required Response. The Required response will require the user to acknowledge the Alert and enter a reason. An alert image and/or sound may be selected from the drop down list.
3. Delivery
Enter the email address to send the alert to. Multiple email addresses must be separated by a comma.
Once all information is entered, click on Save Alert.
Happy GeoFencing!

0 Comments